BannerFans.com
Showing posts with label Food. Show all posts

Saturday, February 11, 2012

Nutella Cherry Hand Pies

This recipe is super-easy and it's a really cute idea for a post-Valentine's Day dinner dessert. I made them last night, and they were absolutely delicious. Feel free to substitute any flavour of jam for the cherry. I'm sure raspberry, blueberry or strawberry would all work equally well. Let's begin!


*1 jar of Nutella
*1 jar of jam of your choice, I like Bonne Maman
*1 package of refrigerated dough (1/2 package makes six, whole package makes 12 pies)
*1 egg (mix with 1 tbsp water to make an egg wash)
*coarse sugar to sprinkle
*large glass or biscuit cookie cutter
*small heart cookie cutter


Tuesday, May 17, 2011

Adventures in Macaronage!

Did I just do a happy dance in my kitchen? Maybe...YES!!!!!
Ladies and gentlemen, I can now cross one of my major life accomplishments off my list...here it goes! Make Perfect Macarons. How did I do it, you ask? Not without abysmal failure.
Follow along with my adventures in macaronage...who knows, you may even learn some tips along the way! (NB: "macaronage" is defined as the art of making macarons)

For the recipe, I mildly adapted this one by Chef Chuck Hughes

You will need:
  • 2 cups almond powder (500 ml)
  • 2 cups icing sugar (500 ml)
  • 4 egg whites, room temperature
  • 1 cup sugar (250 ml)
  • 1 cup water (250 ml)
  • pink gel food colouring
  • raspberry jam for filling
Process:
  • In the food processor, mix the almond powder and icing sugar together until it’s reduced into a very fine powder, for about 2 minutes. Add 2 egg whites and process until smooth (the texture will be similar to almond paste). Add the food coloring and continue processing until the color is all blended in. You can add a few more drops just until you get the color you want. Transfer to a large bowl and put aside.
  • In a stockpot, bring the 1 cup water and 1 cup sugar to a boil and cook for about 15 minutes, until reduced by half and syrup is coating the back of a spoon when dropped in cold water or until a candy thermometer reads 275*.
  • Using a stand or hand mixer, beat 2 egg whites until soft peaks form. Slowly add the hot syrup and continue beating until firm peaks form and the meringue has cooled.

  • With a spatula, gently fold in 1/4 of the meringue into the almond mixture. Continue folding the meringue until completely incorporated. The mixture will be shiny and smooth.

  • Fit a piping bag with a 3/8-inch (1 cm) round tip. Pipe the batter onto the baking sheets. Tap the underside of the baking sheet to remove air bubbles. Let dry at room temperature for 1/2 hour to allow skins to form.
  • Bake the macarons in a 300F oven for 20 minutes ON A DOUBLE BAKING SHEET (stack them for thickness to avoid cracking). Rotate the baking sheet half way through for even baking. Remove from oven and transfer parchment to a cooling rack.
  • Pair macarons of similar size and spread approx 1/2 tsp of jam on each all the way to the edges.
  • Allow to rest for 1 day to meld flavours...YEAH, RIGHT!
My tips for perfect macarons:
  1. Do let them rest after piping for 30 minutes.
  2. Double up on the baking pans to avoid cracking.
Some recipes say these steps are unnecessary. You tell me:

Monday, April 18, 2011

Chocolate Cherry Coconut Larabar Recipe...

My husband has been referring to me as "Pete Schweddy" this evening on account of my delicious, chocolate balls...But joking aside, of the 16 I made, zero remain. This is HUGE praise from S, as his reaction is usually lukewarm to sweets (he much prefers salty snacks).

Many of you have probably had a Larabar or two by now. These bars are delicious...but they hurt...deep in the pocketbook. At as much as $3 a pop, I can afford to eat about 1/2 a Larabar a month, which is simply not enough. This had me scouring their website in an effort to make a version of my very own. The Cherry Pie flavour seemed to speak to me, but then so did the Chocolate Coconut Chew...uh oh! A dilemma! Naturally I decided to try to make both...in one.

I know the basic Larabar principle is equal-ish parts of all ingredients. I watched a few Youtube versions and then I was on my way.

Here's what I came up with:


Ingredients:
-1 cup pitted dates, chopped (be sure to purchase pitted...sadly I overlooked this detail)
-1 cup dried, unsweetened cherries, roughly chopped
-1 cup raw almonds, chopped
-2 tbsp + 2 tsp cocoa or carob powder (unsweetened)
-1/2 cup shredded, unsweetened coconut
-1-2 tsp cinnamon (optional...I didn't use as I forgot)

Directions
-In a food processor, process pitted dates and dried cherries together into a paste. I added 1-2 tbsp of water to loosen the consistency...you could also use any oil you have on hand.
-Put processed dates and cherries into a medium-sized bowl.
-In the same bowl of the food processor (no need to wash...it's all going to mix together in the end) pulse the almonds until they are very finely chopped. Some of mine were almost a flour consistency while the rest were slightly more chunky. It's good to have a variation in texture, but don't process for too long, or you'll wind up with almond butter...not that that's a bad thing ;)
-Put the almonds, cocoa and coconut into the same bowl as the dates and knead until well combined. Tip: Wet hands make the dough easier to work with.
-Shape into bars or, as I did, balls. Use about 1/4 cup of the mixture for the bars and about 2 tbsp for the balls. You could even roll them in coconut or cocoa to finish.

I chose to roll the ingredients into balls after trying the little bouchées at one of my favourite raw, vegan, macrobiotic restaurants Kale Eatery. If you're ever in my 'hood...and you're into that kind of thing, give it a go. It's really, really good!

Enjoy!

Friday, January 14, 2011

S'mores Galore


Today I'm on snack duty at work, and since I have been meaning to make s'more cookies since the Everyday Food recipe was featured in the Toronto Star in December, I thought this would be the perfect opportunity.

S'mores are, bar-none, the most delicious campfire fare out there. I feel qualified to say this as a former Girl Guide...we ate a LOT of campfire food...I can even make a griddle out of a coffee tin for making pancakes, but I digress...I have also made this Bobby Flay barbecue s'more recipe for a cookout I hosted one summer. They were a MAJOR hit.

Naturally I altered this recipe slightly (especially the process), but it is adapted from this one by Martha.

Ingredients

1/2 cup old-fashioned rolled oats
1 cup all-purpose flour (spooned and leveled)
1 cup whole-wheat flour (spooned and leveled)
3/4 teaspoon ground cinnamon
1/2 teaspoon baking soda
1/2 teaspoon salt
1 cup (2 sticks) unsalted butter, room temperature
3/4 cup light-brown sugar
1 large egg
1 tsp vanilla
2 large milk chocolate bars divided into 24 squares (or 24 Dove individually wrapped pieces)
12 large marshmallows, halved horizontally


1. Preheat oven to 350 degrees. In a food processor, pulse oats until finely ground. Put the oats into a large mixing bowl and add flours, cinnamon, baking soda, and salt; whisk to combine.


2. In a large bowl, using an electric mixer, beat butter and sugar until light and fluffy. Beat in egg and vanilla, scraping down side of bowl.


3. With mixer on low, beat in flour mixture just until combined.


4. Drop dough by tablespoons, 1 inch apart, onto a baking sheet. Bake just until lightly golden, 7-9 minutes.


5. Remove from the oven and top each cookie with a chocolate square. Return to the oven for 3-4 minutes. Remove cookies from oven again; heat broiler.


6. Top each cookie with a marshmallow. Broil until marshmallows are lightly browned, 1 to 1 1/2 minutes. Transfer cookies to wire racks to cool.


These are soooo delicious.


Nom Nom Nom Nom

Tuesday, January 4, 2011

Simple and Delicious: My Mom's Apple Crisp

Nothing warms a home like the smell of cinnamon and apples baking away in the oven. I sincerely love making apple crisp...especially this recipe.

For the topping you will need:

1/2 c all purpose flour
1/4 c brown sugar
1/4 c white sugar
1/3 cup rolled oats (not quick cooking)
1 tsp cinnamon
1/2 tsp salt
1/4 c cold butter cut up

For the filling you will need:

6-8 Granny Smith apples (enough for about 2 inches of apples in an 8 inch square baking dish)
3 tbsp sugar
2 tbsp all purpose flour
1 tsp cinnamon
1/4 tsp nutmeg
2 tbsp butter (optional)

Instructions:

1. Preheat the oven to 350*

2. In a large bowl, combine all ingredients for the topping except the butter and stir to combine.


3. Add in cut up butter, and using your hands work the butter into the ingredients until it is well-integrated. The topping should form pea-sized crumbs.


4. Set the topping in the fridge until you are ready to use it.


5. Peel the apples (bonus points if you can peel them in one coil...it's a game I like to play...I know...but I can't help it)


6. Core the apples. I use a melon baller for this task...waaaay easier.


7. Slice the apples, and in the baking dish, toss them with the sugar, flour cinnamon and nutmeg meant for the filling.


8. Dot the apples with the butter for added richness...or skip the butter...it's optional. Sprinkle the reserved topping on the apples.


9. Bake at 350* for 50-60 minutes


10. Enjoy!


This is delicious served with vanilla ice cream as a simple dessert. It's also stellar for using up apples that are too soft to eat out of hand...I've been eating it for as long as I can remember and it never gets old.

Monday, January 3, 2011

Welcome 2011

I must admit, I am sad to say goodbye to 2010. With a wedding, honeymoon, new job, lots of new friendships forged and the acquisition of a soda stream, it will be hard to top. I am moving forward into 2011 with the sole resolution to get more organized...luckily for me, an unfortunate NYE accident has rendered me house-bound, so I'll have a lot of time this weekend to put my plans into action. Lots of closets to clean out, and unused items to give away.

As you may know I love to meal plan, I am currently using this lovely scribble menu planner from the lovely, artistic folks over at Ollibird.


I am planning to make it more permanent by printing it onto magnet paper and laminating it, so it can hang out on my fridge.

This lovely alternative option offers a bit more space and more organizational possibilities.


Click here for the link to download these yourself and laminate them or throw them into picture frames to track your own meals. Also, visit Ollibird for more cool downloads (free!) and tutorials. Their Etsy shop Loveland Miscellany by Ollibird is also worth a visit...it has some super-cute, unique and affordable art prints for sale.

Monday, September 6, 2010

A Back to School Recipe

This week marks my return to the world of the working. I'll be teaching French to students in grades 5-8. All. Day. Long...although honestly, I couldn't be more thrilled about it! I'm also putting together two choirs; one at each of my schools. To say that this new schedule will take some "getting used to" is an understatement...At any rate, I don't anticipate being altogether too thrilled to cook up a meal every evening. Enter: my slow cooker. The following is a recipe that I have returned to time and time again, because it's so darn good...It's also a lovely fall transition recipe, and you'll have tons left over for lunches!


Chicken Orzo Soup

You will need:
2 tbsp extra virgin olive oil
1 large onion, sliced into thin half-moons
2-3 cloves of garlic, minced
2 stalks of celery, chopped
2 carrots, sliced
6 chicken thighs cut into bite sized pieces
2 chicken bouillon cubes
1 tbsp balsamic vinegar
2 bay leaves
1/2 cup dried orzo
pepper to taste

1. In a large skillet, heat the oil and saute the onions, garlic, celery and carrots together in the pan until the onions are translucent, about 5-8 mins. Add them to your slow cooker.

2. In the same skillet, add the chopped chicken thighs and brown completely (they don't need to be cooked through). Put the browned chicken pieces into the slow cooker.

3. (Optional) If you have the time, and you're inclined, "deglaze" the skillet, by adding about 1/2 cup of water and bringing it to a boil while scraping up the brown bits at the bottom of the pan. Add this liquid to your soup for another "flavour dimension." You can completely skip this step if you're pressed for time.

4. Add six cups of water to the slow cooker, the balsamic vinegar, bouillon cubes, bay leaves and pepper. Cook on low for 7-8 hours.

5. 15 minutes before serving, add the raw orzo to the soup. Cover and flip your slow cooker to "high."

Enjoy! Happy back to school!

Note: You can also use any leftover cooked chicken you have on hand to make this soup even easier. Just shred up about 1-2 cups of precooked chicken and skip steps two and three.

Monday, August 30, 2010

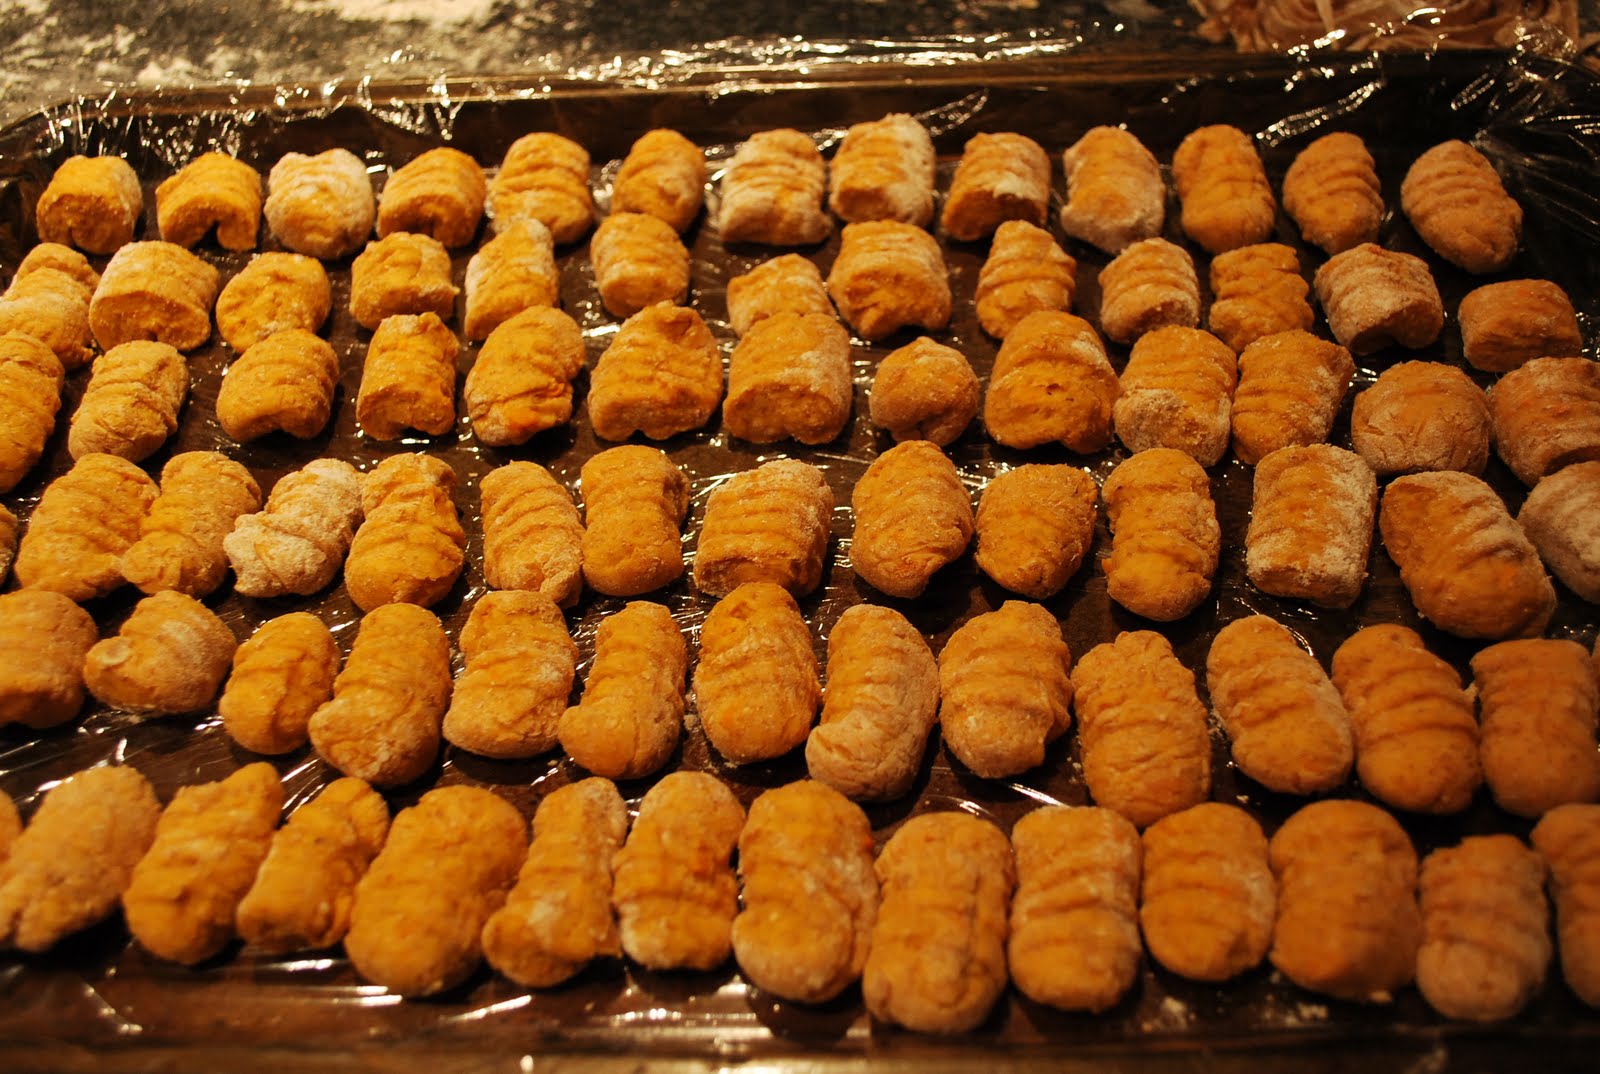
Whole Wheat Sweet Potato Gnocchi Recipe

Growing up as an Italian-Canadian, homemade gnocchi has always been a staple in my diet. I spent hours as a child in my grandparent's basement, watching them work seemingly endlessly making all types of pasta, but my favourite was always the gnocchi. I was always so amazed that a pile of flour, mixed with potato could become the little flavour-bombs I love so well. My grandparents also make gnocchi using zucchini as the binding agent when the garden overflows with them in late July. Zucchini gnocchi is so light and delicious...maybe that'll be a recipe for another day.

My sweet potato gnocchi recipe was created because I wanted to make a slightly healthier version of my favourite old standby...plus I loooooove sweet potato. I would recommend tossing these gnocchi in a little sage- scented brown butter for a decadent treat, or just serving them up with a marinara for a healthy, hearty dinner.

The process of making gnocchi employs the Italian "quanto basta" measurement technique...literally, "until it's enough." So if you're looking for an exact recipe, you won't find it here. I'll do my best to explain exactly what you should see and feel, but rest assured, even if you mess up, the results are usually more than acceptable.

You will need:

- 2 large sweet potatoes
- 3-4 cups of whole wheat flour
- 1 large egg
- salt and pepper to taste


1) Prick the potatoes all over with a fork and roast them at 400* for approximately an hour. Your knife should slide effortlessly through the flesh. Halve the potatoes and let them cool for
10-15 mins.


2) Scoop out the flesh of the potato and put it into a large bowl. Mash the flesh and discard the skin (or eat it as I do...mmm, fibre!). Mix together the flesh, egg, and a little salt and pepper. Then slowly add about 1-2 cups of flour. You should have a sticky, gloopy mess at this point.


3) Turn this sticky, gloopy mess out onto a well-floured work surface, and sprinkle liberally with flour while kneading the dough. Continue adding flour until the dough is easy to handle...It will still be slightly sticky, but you can work with it at this point. Don't worry about adding too much flour, just use what you need. When you have finished kneading, cut the dough into quarters.


4) Roll each section of dough into a 12-15 inch long tube. (Think: kindergarten play-doh centre antics). Try and keep the tubes the same-ish width. Use more flour here if necessary.


5) Cut each tube into pieces. I make my gnocchi about 1cm, you can make yours longer or shorter.

6) In order to ensure the gnocchi holds some sauce, you'll need to give it some ridges using a fork. Hold the fork in one hand and place the gnocchi on the fork. Press and roll the gnocchi with your thumb. Like this:


This will create both ridges on the top:


and a well underneath to catch sauce. This is a very important step. You can skip it, but you may regret it!


7) Allow the gnocchi to dry for about 15-20 mins. If you are cooking them immediately, use a large pot of salted, boiling water. The gnocchi will need about 2-3 minutes to cook. You will know they are done when they float to the top of the pot.

8) If you are freezing them, Don't cook them. Place them in a single layer on a plastic-wrapped baking tray and flash freeze them for about 2 hours. Store them in a large freezer bag. To make from frozen, allow them to thaw and just follow the cooking directions above.


As an aside, I also made fresh whole wheat linguine using my new Kitchen Aid stand mixer attachment...but I think that's a recipe for another day!

Tuesday, December 22, 2009

Curried Chicken Pot Pie Recipe

I have been AWOL for the past week, and for that I apologize. It seems the expectations of the season have left me with little time do anything else. Today I am hitting the shops to find myself a Christmas outfit, and round up some last minute gifts. For dinner, I'll be using my leftover chicken curry to make a delicious chicken pot pie...you can make one too, using this recipe:


Curried Chicken Pot Pie
Recipe adapted from Canadian Family

Ingredients

* 2 tbsp olive oil
* 1 cup diced sweet onion
* 2 cups sliced carrots (1/4-inch thick)
* 1 15oz can chickpeas, drained and rinsed
* 1 tbsp hot curry powder
* 2 tsp kosher salt
* 2 tbsp all purpose flour
* 1 tsp finely chopped ginger
* 1 tsp finely chopped garlic
* 1 can (400 mL) coconut milk
* 1 cup chicken stock (low sodium)
* 1 (2-lb) store-bought rotisserie chicken, meat removed and shredded (about 4-5 cups)
* 2 tbsp chopped cilantro
* 1 sheet frozen puff pastry, thawed
* 1 egg lightly beaten

Directions

1. Preheat oven to 400˚F.
2. Heat oil in a Dutch oven over medium-high heat. Add onion and cook, stirring often
for 3 minutes or until soft. Add next seven ingredients. Stir and cook for 2
minutes. Add coconut milk, stock, chicken and parsley, and season with salt and
pepper. Bring mixture to a boil and simmer to thicken, about 3-5 minutes. Remove
from heat, smooth top to level out mixture and set aside.
3. Roll out thawed puff pastry sheet lightly. Cut pastry to fit over top of curry
mixture in dutch oven. Vent mixture by cutting slits in the dough with the sharp
point of a paring knife. Brush the crust lightly with the beaten egg. Bake 30
minutes or until crust is golden brown and filling bubbles. Let stand 10 minutes
before serving.

Tip: If you don’t have a Dutch oven, sauté onions in a large pot. Then add remaining 11 ingredients as per recipe instructions. Transfer to 11 x 9-inch ovenproof dish, top with pie crust and bake.

Enjoy it, and keep warm!

I won't be posting daily for the next two weeks, but I'll do my best to keep you updated as regularly as possible.

Monday, December 14, 2009

Weekend Recap

Wow! It seems as the weeks get closer to Christmas, the days go by faster and faster! This weekend flew by, but it was packed full of fun! On Friday we went to our friend's housewarming party...met lots of nice people and, although they're just getting set up, I can tell the place is going to look AMAZING!

On Saturday, I spent the day making some stockings for Steve and I. I used a French toile de joie pattern, and I think they turned out quite well.


I'm thinking about embroidering our names on them in cream on the cuff, but I haven't decided for sure yet.

On Sunday we had the in-laws for dinner, so we mostly spent the day cleaning...you know how it is...Thanks to the Smitten Kitchen and The Martha (of course) I made quite a delicious dinner, if I do say so myself. I HIGHLY recommend all of these recipes. The roast recipe is one that I use over and over, because it's so darn delish...and the brussels sprouts recipe is my new favourite veggie recipe!

Sunday Night Dinner Menu

Roast Beef with Caramelized Shallots

Photo from Martha Stewart

Roasted Fingerling Potatoes with Seasoned Salt

Photo from Martha Stewart

Balsamic Braised Brussels with Panetta

Photo from Smitten Kitchen

Vanilla Roasted Pears

Photo from the Smitten Kitchen

Finally, an annual tradition to top the weekend off...watching Muppet Christmas Carol with hot apple cider and popcorn...not the same without my sister or my Kelly, though my dogs were a close second.


ps...I KNOW that red tray has to go...and I'm working on it...the Fiance likes the random red...I am sure some might think it's sooooo 2007, but I am still in love with this Oscar de la Renta Chevron tray:


but you know I'll have to DIY...it's not sane to spend $300 on a tray. I'm thinking some wallpaper should give the same graphic effect. We'll see.