BannerFans.com

Wednesday, December 31, 2008

Chiyogami: Japanese Paper and a New Year's Resolution

Well, as for most people, it is the time of year I like to reflect. 2008 was a good year for me...a new profession, new job, new city, new experiences...overall I'd give it a B+ (but then I'm a teacher...I couldn't give it an "A" unless it was REALLY amazing...like I won the lottery or something). As I look forward to 2009, I see another good year coming. I have thought long and hard about my resolutions this year. Initially I planned on pulling the "I'm not doing resolutions this year" cop-out, however I have thought of some aspects of myself that I could improve...Ergo, I give you my resolutions 2009:

1) Lose 10 pounds (ha! carried over from LAST year!)
2) Work out 5 days per week (I joined The Yorkville Club for incentive.
3) Read at LEAST two books a month (see later in this post for my inspiration to keep this one)
4) Post to my blog more regularly
5) Finish one scrapbook page per month...and make sure my life is interesting enough to warrant a scrapbook page a month...I'm covered until March as of now)

There they are...On to more interesting things!

Chiyogami! What is it? Allow me to give you a brief history:

It is Japanese in origin, dating back to the late 18th century. It is a technique that involves wood-block printing patterns on paper in gorgeous colours...the pattern repeats, resulting in paper that is very similar to a piece of patterned fabric. Chiyogami gained popularity as an inexpensive alternative to washi paper, spreading from Kyoto to Edo (Tokyo today), and Osaka. It is used today for a variety of crafts, including decoupage, origami, and scrapbooking. It is available in most specialty paper and scrapbooking stores online and around Toronto. My favourite source for chiyogami is The Paper Source...and my other favourite source is my mom...who picked me up some while on layover in Japan.

Here are some of my favourites:


...and the larger pieces:
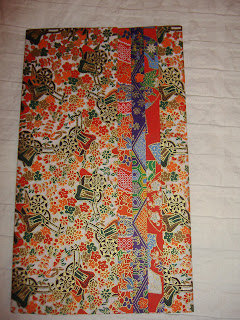


I have become quite fond of making these little bookmarks, as I HATE to fold my page over when I am reading...but I can never find pretty enough bookmarks to keep my interest.


I found this idea on one of my fave blogs, How About Orange? , and you can find the Better Than Others tutorial (an amazing site for origami projects) here .

I am also thinking about making little coasters with some of the papers I have with those little photo coasters you can buy at Kitchen Stuff Plus..and framing some. But I think that can all wait...until next year!

HAPPY NEW YEAR! Stay Safe!

Tuesday, December 30, 2008

Just Another Tuesday Night...And My Kitchen!

I have finally decided to bite the bullet and clean up my kitchen for a "photo op." My kitchen is usually quite clean, but it has to be at another level altogether to be blog-worthy...see what I do for the two people who read my ramblings?
Anywho, I decided to make some healthy Bolognese Pasta...and take some pictures in the interim while it cooked. Overall, it was a lovely dinner, if a little rushed (the Leafs are playing tonight, which means everything has to be done by 7:00). I am also procrastinating, because it's about -100 degrees c outside and I have a fifteen minute walk ahead of me. That means I need two things; 1)a beer jacket, and 2)Alpaca socks, scarf, and yellow mittens. I am working on #1 and I have my mom to thank for #2.

Without further ado, here is my makeshift table:


S and I have decided not to get a dining table as of yet...although you KNOW we have at least one in mind. The dishware is vintage, found at a little shop by my house that was owned by the devil...I mean a nice lady...who screwed me out of my Christmas present by "accidentally" selling it to someone else. But I am not bitter...seriously. The shop closed down now. I call that "karma." I made the placemats. I posted about them earlier.


The little white bowls from Pier One have a spicy oil blend that we learned to make from our new favourite Italian restaurant, Grazie (sorry Cafe Amore...). It is a must for bread-dipping.

The view from the front hall. The art is by my very talented grandpa:


My Terrarium in its rightful resting spot:


The Kitchen Aid enamel cast-iron pot on my stove was on sale from $100 to $29 right before we moved. The only thing I regret about that purchase was not buying 10 more. Seriously, it is the only pot I ever want to use. The larger one was on sale earlier this month for a similarly ridiculous price, but now I have to pay rent. Blast this "adulthood."

My sassy microwave, knife rack, and wine rack...fully stocked...I love that one of my best girls is a viticulturist.


I really should go meet my peeps at McMurphy's...they probably think I was held up by terrorists or something.

Monday, December 29, 2008

Terrarium, Mon Coeur!

OK, so...I have finally arranged my terrarium (the vessel previously housed a candle...) You may recall this photo from my fave blog decor8 .


Well, thanks to my mom (and my long dead Aunt Santa) I have created something that I think is truly beautiful, and a little bit enchanted...


Here it is in action...although this is NOT its permanent home...that will be by the sink, but my kitchen looks like a bomb hit it right now...


The plant is a mystery...but I adore it. I think it is a cactus or succulent of some kind. I put some shells and river rocks in for visual interest, and some drainage gravel.

I know it's a bit untimely, but I thought that I would add a photo of my Christmas tree for good measure. Note the black scalloped tree skirt (oh wait, it's not visible)...I made it. I really ought to post tutorials someday, but I simply don't have the patients.


I hope you all got what you wanted this Christmas...I sure did...*hint*


Now...where to put it...

It is almost resolution time (two more days!) in addition to my usual resolution to lose 1olbs, I will be adding "redecorate bedroom." I will definitely keep you posted.

Tuesday, December 23, 2008

I'm Back, and This is My Living Room

Hi all...

I am finally ready to resume my regular postings. I have been living in the city for almost two months, and I feel quite settled in now. Our space is still a work in progress, but our vintage-modern vision is coming along. When we first moved in we had a TON of cleaning to do (of course), as well as painting and...wallpaper...*shudder

It actually went relatively smoothly, and despite some interesting paint antics in the bathroom, everything came together quickly...That's what months of pre-planning will do for ya.

Without further ado...here is the "before" pic of my living room:


After a lot of consideration, here is how our living room looks today:


I know, right? I am an AWESOME photographer...and there are more photos to come.

The gray chairs are vintage, which we had reupholstered. The couch, which is not clearly visible, was made for us by our reupholsterer. My best advice when designing a new space is not to rule out custom furniture as an option. The couch we had made cost less than the Ikea version we wanted, and we got the dimensions and the fabric we wanted. My point is, you CAN afford custom, and it will last longer, and look more original than the mass-produced versions. Just shop around. You'll be pleasantly surprised.

Tuesday, November 4, 2008

We Have Arrived!

I will be relatively incommunicado for the next few days, as we have moved to the new place, and have no internet or phone hookup as of yet. After Friday I should be up and running again and posting like a madwoman, as we have already done quite a bit of work on the place...The wallpaper is up, and it's basically amazing, the walls in the living room are painted, and all of our pictures have been placed. To complete the living room, I still need a few small picture frames, and some window treatments, but those will have to wait until mid-month.
There is tons of work to be done!

Until Friday!

Tuesday, October 28, 2008

Why Sarah Richardson is Famous, and I Am Not

I have been religiously watching my fave designer, Sarah Richardson, for over eight years now. She has had several shows on HGTV, and has recently been airing shows on how to reno a home "Sarah-Style." ("Sarah-Style" translates loosely to "the best design you've ever seen-style") Essentially, Sarah is famous for her transcendent designs. That is, they transcend the realm of "amazing" into the realm of "perfect." I realize I am gushing, but really...she's the best.

Exhibit A: The Living Room


Exhibit B: The Dining Room


Exhibit C: The Master Bedroom


I really could go on and on, but you can clearly see where I am going with this. She makes neutrals look so bold with the use of pattern and texture, and her designs are very classic...you know they'll still be beautiful in 10 years (good thing too, cuz you'll have spent a mint on them!)

My design inspiration comes from her principles (she has a design column in the Globe and Mail), and of course from pictures of her exquisite work. I really hope that my apartment is even half as beautiful as any of the rooms she creates.

The best design advice I have gleaned from her show came as an off-handed comment she made in one of her episodes. She said that when she is envisioning a project, she actually creates the finish project in her mind, and works from that. As a non-designer, that was totally a novel idea to me...Until that point, I had just been adding random pieces to my decor and praying that they fit...Hopefully this time everything will turn out as a result.

Something Gorgeous!

I have officially found the most beautiful, June Cleaver-style aprons I have ever seen. I would wear one of these babies as a dress...and too bad for the people behind me! I am purchasing one ASAP...like next week...I'll show you:


You can have your own simply by clicking here ...I am too excited! I fully believe this apron could be the key to inspiring me to clean my house...VERY regularly!

Speaking of etsy, if you have never checked it out, you should. It is a whole community of artsy people who share their craft with others via the interweb. I love shopping around for vintage finds, and interesting haberdashery...The best part is you are usually supporting a young, up and coming artist of some medium...oh, and your purchase could potentially appreciate a whole lot, if you catch my drift.

On another happy note, I have an appointment with a potential buyer for my car tomorrow! I am keeping my fingers crossed!

Saturday, October 25, 2008

It's the Besta!

After two unsuccessful trips to Ikea to pick up our t.v. console...we finally got it right today! Here it is, ladies...the Besta Burs!


This gorgeous, new-ish little gem has oodles of storage space for all your hideous media-storing needs. It is going to look absolutely SMASHING in our new digs.

As the countdown continues, and we get closer to crunch time, I have been frantically researching moving tips. Enter: (as always) Martha. I printed off the mover checklist and about 12 labels. You can find the labels here. Now all I have to do is actually get down to packing...according to this checklist, I'm two weeks behind!

Friday, October 24, 2008

If I had a spare $4000...

Allow me to present to you the work of my favourite Canadian photographer, David Burdeny. Although I do not profess to have any technical knowledge of his medium, I find his pictures completely exquisite.
I stumbled upon his work roughly two years ago while perusing an interior design magazine, and I have been following him closely ever since. I had visions of plastering the walls of my perfectly-appointed downtown loft in his photos...until I realized that I do not have $4000, or a perfectly-appointed downtown loft for that matter. I am waiting to purchase his book, and will do so as soon as more copies come available. It will soon be available here.

Here are some of my favourite images...


Now, of course, ever the DIY-er, I won't let a stupid obstacle like money get in the way of something that I want. Enter flickr the photo sharing site. Steve and I found quite a few less-gorge, but similarly styled photos, and we will be having these custom matted instead. Wanna see 'em? Come over!

One week to go!

Monday, October 20, 2008

Terriffic Terrariums

My love of all things vintage has recently manifested as a mild obsession with terrariums. These adorable little plant domiciles are quite fascinating.
My interest was initially piqued by this photo, which I found on one of my fave blogs: decor8.
I was initially hoping for a pear, pumpkin, or apple terrarium, but alas, I found none...It was at that point I broadened my search to include the egg.

May I present to you the newest addition to my decor family, the egg terrarium!


I simply cannot wait until it is brimming with greenery. Until then, I will have to sate myself with flickr photos like this one:

Making Budgeting Pretty

I would certainly would not say that I enjoy budgeting, but I dislike the thought of going broke more. After watching Gail Vaz Oxlade's show "'Till Debt Do Us Part" for the past few years (which you can view here) I have decided that not going broke is simply a matter of employing a few simple strategies.

1) Make a tangible budget: You can create your own using Excel, or try this interactive version made by Gail herself.
2) Live on cash and save receipts
3) Save for a rainy day

Since I usually require something shiny or pretty to coax me into unpleasant tasks, I have created envelopes using a template by my fave blogger Jessica Jones at How About Orange. I used scraps of leftover scrapbooking paper and labelled them with sticker letters. The envelopes are designed to hold receipts, and they correspond with the categories of our variable expenses.


Making these envelopes was seriously fun, and it brought me right back to my glory days in JK, when my teacher had me demonstrate for the class how to make the little envelopes I folded incessantly as a child. I really do love to make useful things.

Case in point #2
My magnetic spice rack, which I made using watchmaker tins from Lee Valley, and some self-adhering magnets from the dollar store. I think the total cost of this project was about $20, and I can add to my collection at any time relatively easily. These would have cost me easily $70 at Home Outfitters. Note: They are not all filled yet, but soon!


Yay for DIY!

Friday, October 17, 2008

My New-Old Table

So, Steve and I were rummaging around the house searching for materials with which to make our own version of this coffee table, when we stumbled across his hideous old coffee table from uni. He joked that we could just use it instead expending all of the extra effort to make a new one. My initial instinct was to barf, but then I took a closer look. The table had nice clean lines, it WAS vintage (70's but, hey...old is old), and it would probably look stunningly modern painted a high-gloss white.
The next day, we tripped-it into Ajax to pick up some spray paint and bulls eye primer (no sanding or stripping required= good) at Home Depot. Upon wood-filling, priming, and gloss coating, this is what we had:


Spray painting is FUN!

Turns out, it was a great idea after all.

On a side note, I finished the place mats recently, but I will not be posting about those, as my top stitching skills did not improve as I had stipulated.

Friday, October 10, 2008

Coasters and Such

As promised, I am posting some photos of my work. I do not claim to be a seamstress, but I am quite proud of these double-sided coasters. They were a total snap to make...
All I did was:
1) Measure a coaster I already had, and added 1/4 inch on all sides for seam allowances.
2) Cut out one square in each of my coordinating patterns (two squares per coaster).
3) Fold seams under according to my 1/4 inch seam allowance and press. I did this for all squares.
4) Clipped all four corners on a diagonal on each square.
5) Applied Heat and Bond interfacing according to package instructions, and fused the top and bottom pieces together.
6) Topstitched around the perimeter of my coaster. (Note to self: improve topstitching)
7) Enjoyed my coaster!

If you have coordinating fabric in different colours, you may want to have one colour thread on the top, and one on the bottom. The solution is to simply thread the top spool with the thread you want on top, and your bobbin with the thread you want showing on the bottom.

Tomorrow's projects: Matching placemats, and pot holders. I also have an awesome felt pillow project that I found here in my cue. I am definitely going to need to improve my topstitching for that project!

Here are the photos...unprofessional as advertised:


Sunday, October 5, 2008

Wallpaper: Done!

I purchased the wallpaper for our feature wall today at the local Home Depot. The manufacturer is a Canadian company called Sanitas. This wallpaper is absolutely perfect because it picks up on all of the chrome elements we will have throughout the apt. I also love the fact that it has a vintage feel, with a modern twist. So many of the pieces we have been amassing have that feel (and the ones we've been repurposing as well) that it really just ties everything together. It's a totally unsafe decision, but I think it's going to be perfect.

Here is a picture of the print:


I'll post a photo of it when we've finished pasting it...and possibly a video of the process, if I'm feeling ambitious.

With regards to paint options, the designer from Benjamin Moore helped me pick the perfect gray called Coventry Gray, which will be the primary wall colour throughout the living space, and Escarpment, which will be another accent of sorts in the den, which can be seen from the living room.

I think the window coverings will be kept simple (we don't need too much going on with the wallpaper, etc). I am thinking white wood blinds.

HURRY UP NOVEMBER!!!

Friday, October 3, 2008

Hello Out There!

...she says as though anyone will be reading this blog...

Steve and I are busily stock-piling everything we will need in the new apartment...I am going nuts counting down the days. Obviously since there are 30-something, I need something to occupy my time. This is where sewing comes into play. I have made several small projects, and have several more on the go...just small household items...coasters, placemats, pillows...etc. I will post some photos at a later date, but I warn you I am a terrible photographer...as in, I can't even tell a good picture from a bad one unless it is glaringly obvious....but I try.

I would like to share the loveliest of my purchases with you...my Glamour Clock from EQ3.

Essentially this clock is the most beautiful specimen I have ever seen. It is also very labour-intensive to create...I know...I tried. I created a modified version of this clock. What a disaster. For the price...I should have just bought it. That being said, this clock is a STEAL! We saw (and loved) the same clock at an NYC boutiqe, Apt New York in Soho for $250! I loooove EQ3! My next purchase is the Cast floor lamp: Exhibit B
Tomorrow I pick paint to coordinate with the wallpaper! I shall keep posting!